Gluten Free, Keto Friendly, Low Carb, easy chicken bouillon


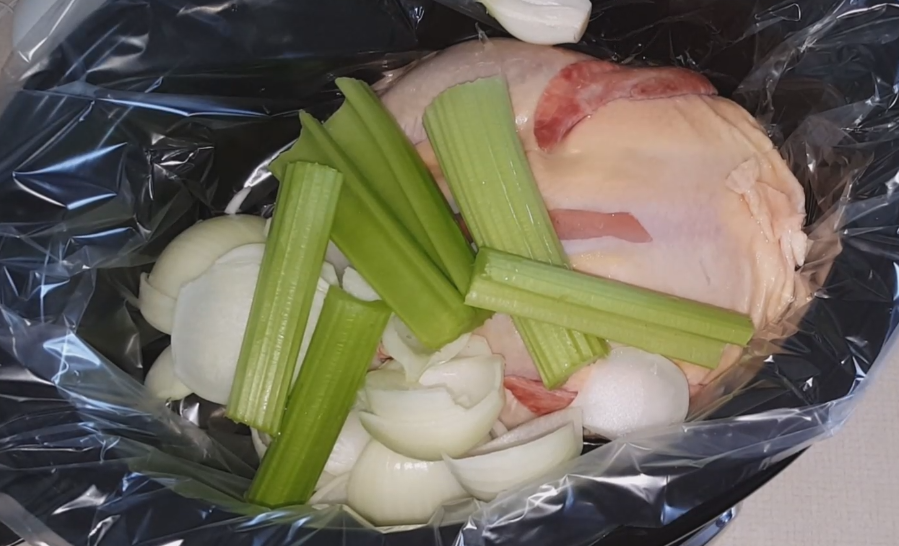
If you make your own chicken broth, or if you buy chicken broth, here is a very easy way for you to take chicken broth / stock and make chicken bouillon out of it. 

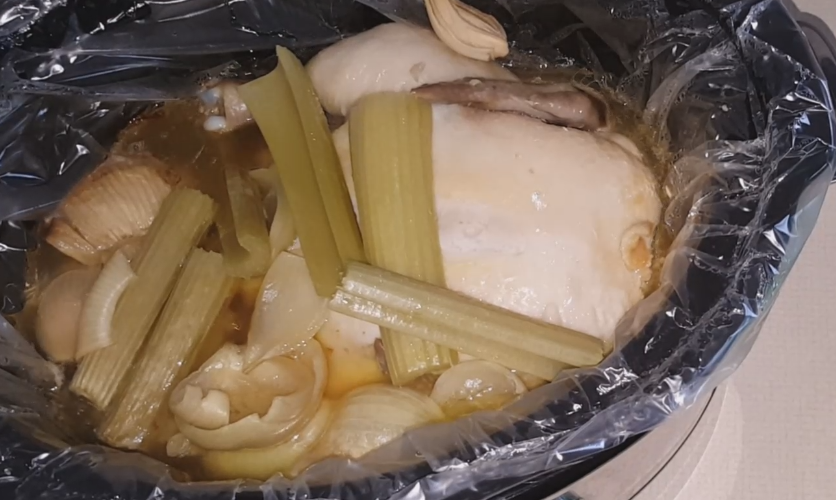
It is a very easy process to do. Basically just take about 6 cups of chicken broth / stock and put it into a large pan and cook on medium high until it starts to boil, then turn down the heat. 

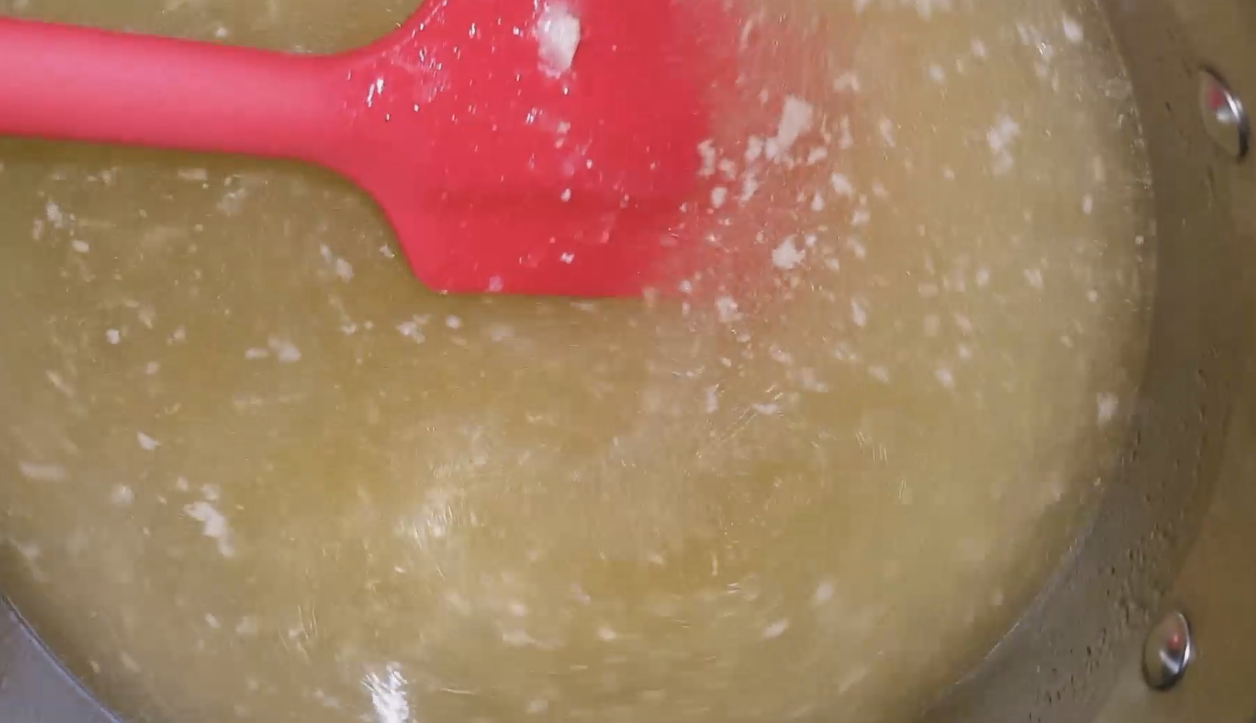
Let it simmer for a few hours, stirring it every once in a while until it reduces to a syrup like consistency. 

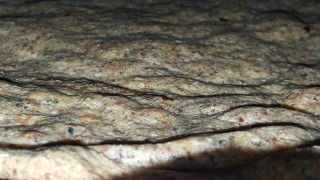
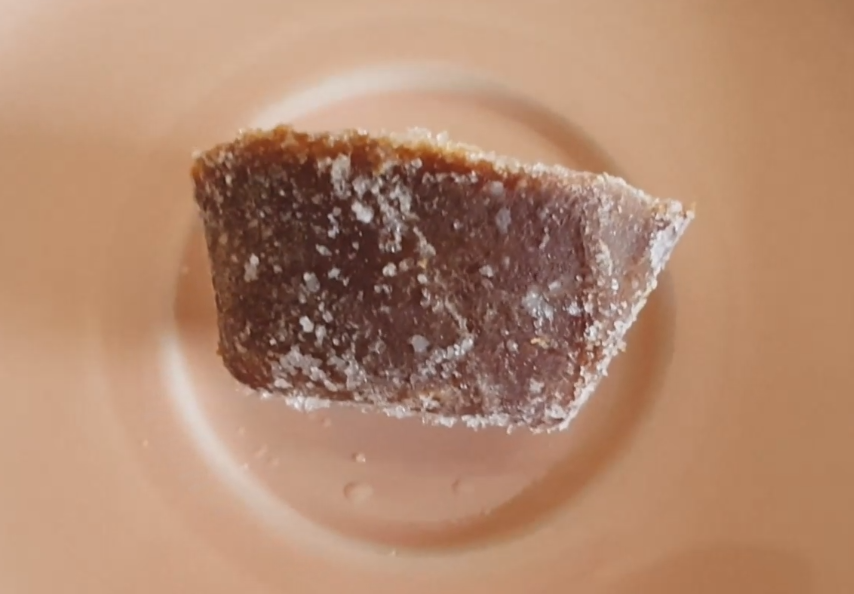
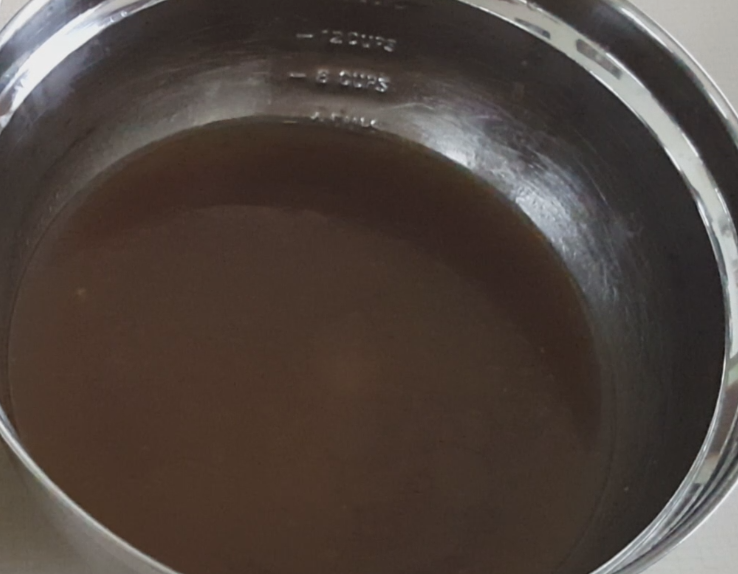
You will known when it gets to a syrup like consistency when you can take a rubber spatula and run a line in it and it does what the above picture shows. 


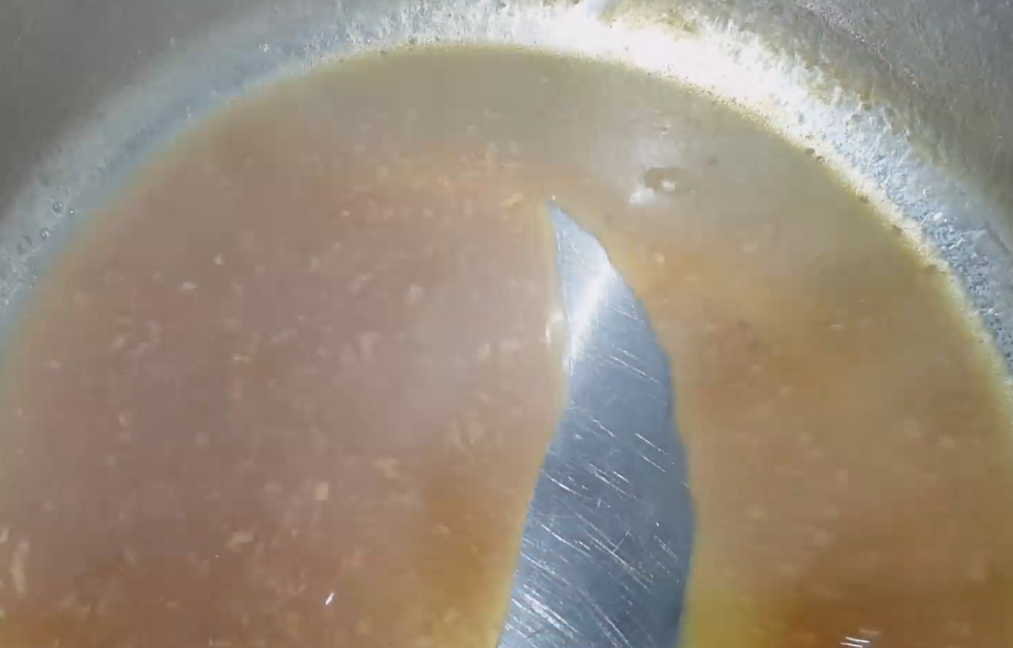
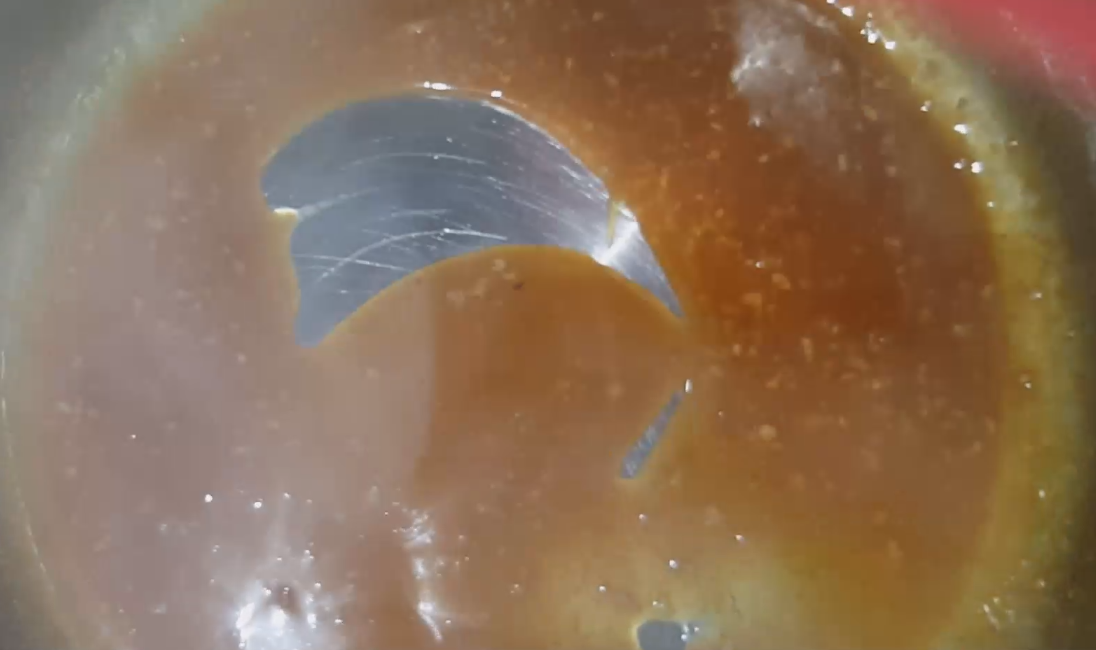
At this point you want to watch it so that it does not burn. 

Cook it down for a bit longer until it becomes almost like a thick syrup like

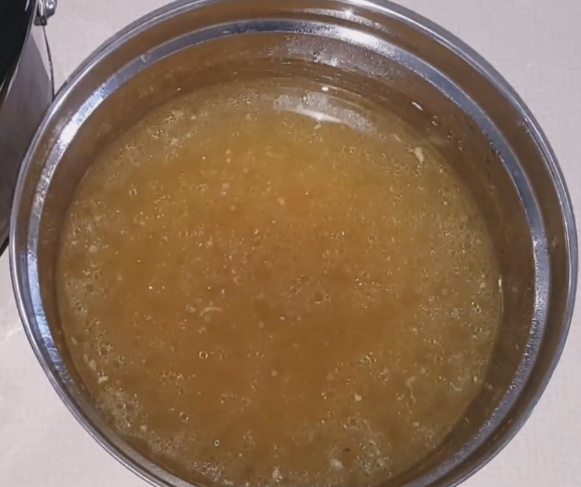
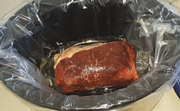
Now you can take it off the heat and I will usually put this into ice cube trays. From there you can freeze them and once they are solid enough to work with , bag and seal them. 

Note that if you make your own, they more than likely will never actually become 100% frozen. They will be firm, but because of the fat in them they will not freeze all the way. 


Ingredients:


Directions :

  1. In a large large pan, add the home made chicken broth or  store bought chicken broth
  2. Turn the heat up to a medium high. 
  3. When the chicken broth starts to boil, turn the heat down and using a rubber spatula stir every once in a while. 
  4. When the chcken broth turns into a syrup like consitency, turn the heat down a bit more and stir a bit more frequently. 
  5. When the chicken broth becomes a heavy like syrup, remove from heat and either add to ice cube trays
  6. Once they have been in the freezer long enough, you can remove them and bag them and seal them. 


Watch this video on Dailymotion -  http://dai.ly/x6hz31f

Watch this video on DTube - https://d.tube/v/jmrados/1qq5yzx8

Watch this video on YouTube - https://youtu.be/yHL07NBTN7A


Gluten Free, Keto Friendly, Low Carb, Chicken Stock / Broth


I like to make my own broth / stock, mainly because I know what goes into it. It is even better when I can do it with farm fresh meats. I will usually make a bit of different kinds of broth / stock and store them into my freezer, sealed as that way I do not have to worry if it is gluten free or not (and not get myself and my daughter sick), nor do I have to worry about anything that may be in the stock.I know that I have at least 10 cups of each on hand in my freezer, and by cooking a roast you can easily save the juices and make your own stock. 

This only needs a few ingredients to make, and the nice thing is that you control what goes into it.
Basically just need a crock pot, crock pot liner, a whole chicken, onion if you want and maybe either celery or some other vegetable (such as carrots). 


All that you need to do is take the whole chicken and place it into the crock pot, add the amount of vegetables that you want to add to it (for flavoring), then cook it on low for 10 hours, then save the juices left over. Those can be bagged and sealed and placed in your freezer. 


Ingredients:

  • Whole Chicken
  • crock pot liner  (optional)
  • Vegetables (onions, carrots, celery, etc.. ) - optional

Directions: 

  1. Place a crock pot liner in your crock pot
  2. Place the Whole chicken inside of your crock pot
  3. add any vegetables that you want to
  4. add 3 cups of water
  5. cook the Whole chicken on low for 8 - 10 hours. 
  6. Once the chicken is done, grab a large bowl  add a colander into it. Remove the chicken and place into the colander (you may want some spatulas as it may fall apart)
  7. Once the juices have drained, move the chicken to a cutting board and do what you want with it (cut it up for dinner, use it in another recipes, etc.. )
  8. Remove the crock pot liner with the chicken stock / broth  inside of it. 
  9. Drain the chicken stock / broth  into the colander that is inside of the  bowl
  10. Place in your fridge overnight to allow the fat to solidify. 
  11. Remove the fat (if you want) and then place in bags to seal. 

See my video below on how this is done. 


Watch this video on Dailymotion - http://dai.ly/x6hz402

Watch this video on DTube - https://d.tube/v/jmrados/v0mvdsgk

Watch this video on YouTube -https://youtu.be/yAMX4_1JPfQ


Gluten Free, Keto Friendly, Low Carb, Beef Stock / Broth

I like to make my own broth / stock, mainly because I know what goes into it. It is even better when I can do it with farm fresh meats. I will usually make a bit of different kinds of broth / stock and store them into my freezer, sealed as that way I do not have to worry if it is gluten free or not (and not get myself and my daughter sick), nor do I have to worry about anything that may be in the stock.I know that I have at least 10 cups of each on hand in my freezer, and by cooking a roast you can easily save the juices and make your own stock. 

If you watch out what you put into the crockpot,you can easily use it. We used to use packets of french onion soup mix, but no longer do that. One of the main reasons we dont is that it is not gluten free, and the other is that it will give the beef broth a flavor of french onion soup, to which we do not want that in the stock. 

This only needs a few ingredients to make, and the nice thing is that you control what goes into it.
Basically just need a crock pot, crock pot liner, beef roast, onion if you want and maybe either celery or some other vegetable (such as carrots). 


All that you need to do is take the beef roast and place it into the crock pot, add the amount of vegetables that you want to add to it (for flavoring), then cook it on low for 10 hours, then save the juices left over. Those can be bagged and sealed and placed in your freezer. 


Ingredients:

  • Beef Roast
  • crock pot liner  (optional)
  • Vegetables (onions, carrots, celery, etc.. ) - optional

Directions: 

  1. Place a crock pot liner in your crock pot
  2. Place the beef roast inside of your crock pot
  3. add any vegetables that you want to
  4. add 3 cups of water
  5. cook the beef roast on low for 8 - 10 hours. 
  6. Once the beef roast is done, remove the roast. 
  7. In a large bowl  add a colander
  8. Remove the crock pot liner with the beef broth inside of it. 
  9. Drain the beef broth into the colander that is inside of the  bowl
  10. Place in your fridge overnight to allow the fat to solidify. 
  11. Remove the fat (if you want) and then place in bags to seal. 

See my video below on how this is done. 


 See this video on Dailymotion - http://dai.ly/x6hz2if

See this video on DTube - https://d.tube/v/jmrados/tz368luh

See this video on YouTube - https://youtu.be/4_vGP8c4k1I


Gluten Free, Keto Friendly, Low Carb, Crustless Cheesecake


Gluten Free, Keto Friendly, Low Carb, Cheesecake


Here is a recipe for a basic, low carb,gluten free, keto friendly cheesecake. This is a no-thrills cheesecake, not much to it and simple to make. You can modify this to have the different flavorings in it if you want such as chocolate, fruit, seasonings, etc..


Ingredients:


Directions:

  1. Grease a pie plate
  2. preheat the oven to 350 degrees
  3. In a bowl, add the cream cheese and cream them using a handheld mixer or a kitchenaid mixer until it has a nice creamy consitency. 
  4. add the Splenda, sucralosestevia or Erythritol , vanilla extract and continue to mix for a few more minutes. 
  5. Add one egg at a time and mix for about a minute after adding each egg. 
  6. Pour into the greased pie plate
  7. bake for about 45 - 50 minutes. 
  8. Let it cool and serve. Add toppings if you do not like the taste of plain cheesecake. 


Gluten Free, Keto Friendly, Low Carb, Ham and Egg Bake

Gluten free, Keto Friendly, Low Carb Ham and Egg Bake

In my quest to find a replacement for the Ham and Egg bake that my family loves to have for breakfast in the AM, i decidedto take out the high carb ingredient (potatoes) and replace it with a low carb alternative (cauliflower). This needed to cook longer than a traditional egg bake does, possibly due to the extra water in the cauliflower, but it still turned out to be good. I did not put any "seasoning" on this, but some ground pepper seemed to compliment this fairly well. 

If ham is not your thing, you can certainly replace the ham with another protein source, or you can leave it out all together. I have used turkey ham from time to time when is on sale and cheaper than the regular ham product. 

Gluten free, Keto Friendly, Low Carb Ham and Egg Bake


Gluten free, Keto Friendly, Low Carb Ham and Egg Bake


Ingredients:

  • 12 eggs
  • 3-4 cups chopped ham or turkey ham
  • 1 head of cauliflower cut up into small pieces
  • 1 cup of heavy whipping cream
  • about 2 cups of shredded cheese. 


Directions:

  1. Preheat the oven to 350 degrees
  2. Cut the caulilower up into small pieces
  3. Place the cauliflower into a 9x13 pan and drizzle with some olive oil
  4. Cook in the oven for about 10 - 20 minutes to soften up the cauliflower. 
  5. While the cauliflower is cooking, in a medium bowl add the eggs and the heavy whipping cream (can also use almond milk) and mix together using a immersion blender or a handheld blender. 
  6. Chop the ham or turkey ham into bit size pices.
  7. Once the cauliflower is done cooking, let it cool for a bit (unless you plan to make the casserole right away)
  8. add the ham and 1/2 the cheese into the cauliflower and mix well. 
  9. Add the egg mixture to the 9x13 pan, then top with the rest of the cheese
  10. Cover with aluminum foil and bake for 30 - 45 minutes. 
  11. Remove the aluminum foil and bake for an additonal 45 minutes. Check the casserole at the end of the 45 minutes to make sure that all the eggs are cooked. If they are not fully cooked, cook for an additional 20 - 30 minutes. 
  12. Check the eggs about every 15 minutes to see if the eggs are done or not.


Gluten Free, Keto Friendly, Low Carb, Almond Flour Pizza Crust # 3


Making pizza crusts that are not only gluten free, but also keto friendly (low carb) can be tricky sometimes but once you find what works,you can tinker here and there to find different variations that definatly work. The almond flour crusts are no exception here as I have about 3 or 4 different variations of the almond flour crust and I have about 7 or 8 different pizza crusts that fit both diets. This latest one is one that the whole family for sure likes, and it like the rest will be one that is only requested once in a while once people get too much of it, but to have as many pizza crusts as I do for sure help. 


This one is different, yet good. The setup for this is quite easy and it bakes quite nice also. My wife likes this one probably the best next to the cream cheese pizza crust and my daughter seems to like it also. They both say that this one is not nearly as greasy as the other ones


This is one of the crusts that you will want to par bake first, and you will for sure want to bake it onto a sheet of parchment paper on your pizza pan to prevent it from sticking.


Ingredients:

Directions: 

  1. Preheat the oven to 350 to 375 degrees
  2. Melt the cheese in a bowl for about 60 - 90 seconds. 
  3. Add all the ingredients into a bowl.
  4. Using a handheld mixer mix up the ingredients until it starts to resemble dough. 
  5. Get out a 14 or 16 inch pizza pan and line it with parchment paper
  6. Place the dough on top of the parchment paper and then place some clear plastic wrap on top to prevent sticking
  7. Press out the dough using your hands with the clear plastic wrap on top of the dough still
  8. Once the dough is in the shape that you want it to be in, remove the clear plastic wrap and bake it in the oven for 15 to 20 minutes  or so. 
  9. Use your favorite pizza sauce and make your pizza. My favorite sauce is ranch dressing


Gluten Free, Keto Friendly, Low Carb, 90 Second Personal Cake


The image above does not do this justice, mainly because I am horrible at frosting things. The frosting department is usually done by my wife, as she will usually take over since I am so horrible at it. I just cannot seem to get this down no mater how hard I try to do at it. 

This is a very simple cake that uses the principles from the 90 second bread, and the 90 second strawberry short cake recipes to make a individual cake. This works in a pinch, just like the other ones do and this one can be made just for you if you go to a party that has cake at and you dont want to be left out. The super nice thing about this, is that you can make this at work!  All you need to do is bring some frosting with you, and the ingredients and you can actually bring this along and mae it in your break room at work!

In the video below I said that I used 1 tsp of baking powder, but that was wrong I used 3 teaspoons of baking powder


Ingredients:

Directions:

  1. Grease a small pyrex bowl or a coffee mug
  2. Mix all the ingredients into a bowl
  3. Cook in your microwave for 90 seconds. 
  4. Let cool for a while
  5. After it has cooled, frost it with the frosting and enjoy. 


Watch this video on Daily Motion - http://dai.ly/x6hrk78


Gluten Free, Keto Friendly, Low Carb, 90 second ice cream sandwich


One thing that I miss about doing gluten free, and low carb at the same time is Ice Cream Sandwiches. 

Here is a fairly good base for a ice cream sandwich that definatly works, especially if you make your own ice cream. If you need a recipe for a ice cream, I do have a recipe on how to make your own Keto Friendly, Low Carb, Gluten Free Ice Cream

If you have your own Ice Cream made up, or you bougt some, the sandwiches here only take 90 seconds as we are using the base for the 90 second bread, to which we modified to make the strawberry shortcakes. This recipe is fairly simple and the nice thing is that you can easily add more cooa powder, remove cooca powder if it is too much for you. You can also add more Erythritol if you want, or you can add more vanilla extract. You could even make the sandwiches and put low carb whipped cream in between and freeze that for a while. 


Here is how I made it. 

Ingredients:

Directions:

  1. Grease a small pyrex bowl or a coffee mug
  2. Mix all the ingredients into a bowl
  3. Cook in your microwave for 90 seconds. 
  4. Let cool for a while
  5. Cut in half and add some Keto Friendly, Low Carb, Gluten Free Ice Cream to the middle. 
  6. If you want, you can put it in the freezer for a bit to harden up the sandwich. 


Gluten Free, Keto Friendly, Low Carb, 90 second strawberry shortcake


90 second strawberry shortcake, yep, I said 90 second. 

This is bread that you can make in a coffee mug, a small pyrex bowl or something small like that. 

It comes out to about the size of 2 english muffins that are stacked on top of each other, but this bread is spongy unlike english muffin bread. When in a pinch, this is super easy to make and the uses of this bread are almost endless. This is the same concept as the 90 second bread, but this adds a few different flavors to it and when combined with 

You can add seasoning to the bred if you want to get rid of some of the eggy flavor

[More]


Gluten Free, Keto Friendly, Low Carb, 90 second bread


90 second bread, yep, I said 90 second bread. 

This is bread that you can make in a coffee mug, a small pyrex bowl or something small like that. 

It comes out to about the size of 2 english muffins that are stacked on top of each other, but this bread is spongy unlike english muffin bread. When in a pinch, this is super easy to make and the uses of this bread are almost endless. 

You can add seasoning to the breadif you want to get rid of some of the eggy flavor


Here is how to make this versatile bread. 

Ingredients:


Directions:

  1. Grease a small pyrex bowl or a coffee mug
  2. Mix all the ingredients into a bowl
  3. Cook in your microwave for 90 seconds. 

That was easy. 

 Watch this video on Daily Motion -  http://dai.ly/x6hfp4d


Nutrition Facts
Servings 1.0
Amount Per Serving
calories 298
% Daily Value *
Total Fat 26 g 40 %
Saturated Fat 9 g 47 %
Monounsaturated Fat 2 g
Polyunsaturated Fat 1 g
Trans Fat 0 g
Cholesterol 216 mg 72 %
Sodium 1633 mg 68 %
Potassium 72 mg 2 %
Total Carbohydrate 9 g 3 %
Dietary Fiber 2 g 9 %
Sugars 1 g  
Protein 11 g 22 %
Vitamin A 13 %
Vitamin C 0 %
Calcium 88 %
Iron 18 %


Previous Entries / More Entries