Gluten Free, Keto Friendly, Low Carb, easy chicken bouillon


If you make your own chicken broth, or if you buy chicken broth, here is a very easy way for you to take chicken broth / stock and make chicken bouillon out of it. 

It is a very easy process to do. Basically just take about 6 cups of chicken broth / stock and put it into a large pan and cook on medium high until it starts to boil, then turn down the heat. 

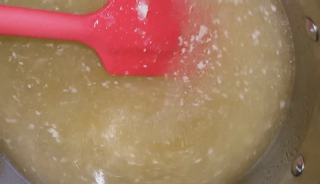
Let it simmer for a few hours, stirring it every once in a while until it reduces to a syrup like consistency. 

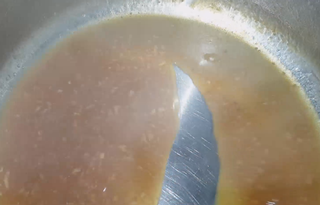
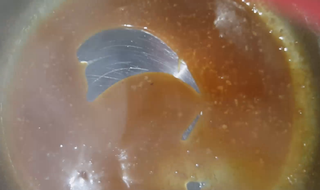
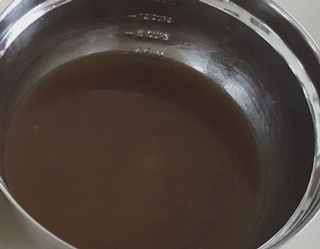
You will known when it gets to a syrup like consistency when you can take a rubber spatula and run a line in it and it does what the above picture shows. 


At this point you want to watch it so that it does not burn. 

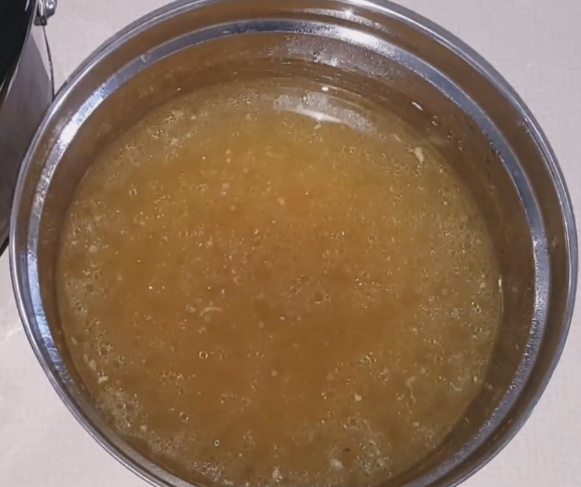
Cook it down for a bit longer until it becomes almost like a thick syrup like

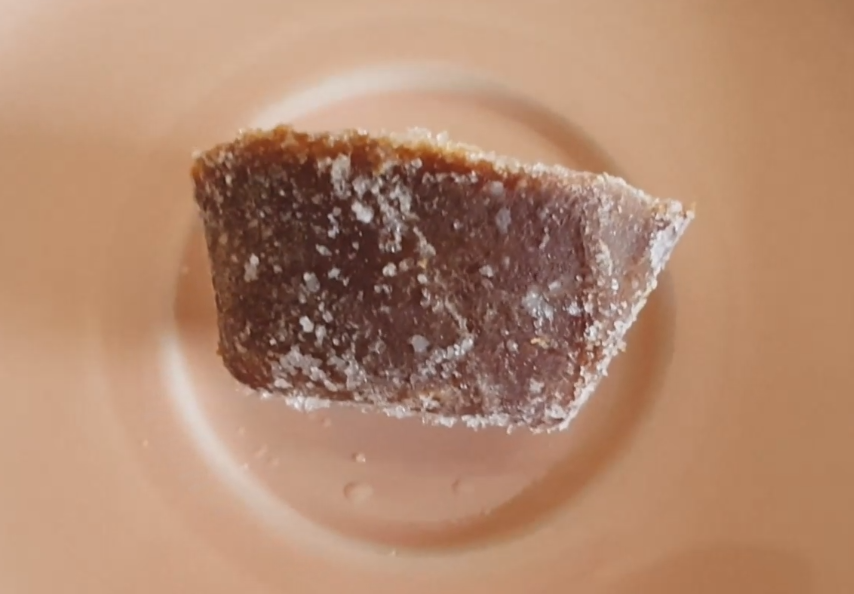
Now you can take it off the heat and I will usually put this into ice cube trays. From there you can freeze them and once they are solid enough to work with , bag and seal them. 

Note that if you make your own, they more than likely will never actually become 100% frozen. They will be firm, but because of the fat in them they will not freeze all the way. 


Ingredients:


Directions :

  1. In a large large pan, add the home made chicken broth or  store bought chicken broth
  2. Turn the heat up to a medium high. 
  3. When the chicken broth starts to boil, turn the heat down and using a rubber spatula stir every once in a while. 
  4. When the chcken broth turns into a syrup like consitency, turn the heat down a bit more and stir a bit more frequently. 
  5. When the chicken broth becomes a heavy like syrup, remove from heat and either add to ice cube trays
  6. Once they have been in the freezer long enough, you can remove them and bag them and seal them. 


Watch this video on Dailymotion -  http://dai.ly/x6hz31f

Watch this video on DTube - https://d.tube/v/jmrados/1qq5yzx8

Watch this video on YouTube - https://youtu.be/yHL07NBTN7A


Gluten Free, Keto Friendly, Low Carb, Chicken Stock / Broth


I like to make my own broth / stock, mainly because I know what goes into it. It is even better when I can do it with farm fresh meats. I will usually make a bit of different kinds of broth / stock and store them into my freezer, sealed as that way I do not have to worry if it is gluten free or not (and not get myself and my daughter sick), nor do I have to worry about anything that may be in the stock.I know that I have at least 10 cups of each on hand in my freezer, and by cooking a roast you can easily save the juices and make your own stock. 

This only needs a few ingredients to make, and the nice thing is that you control what goes into it.
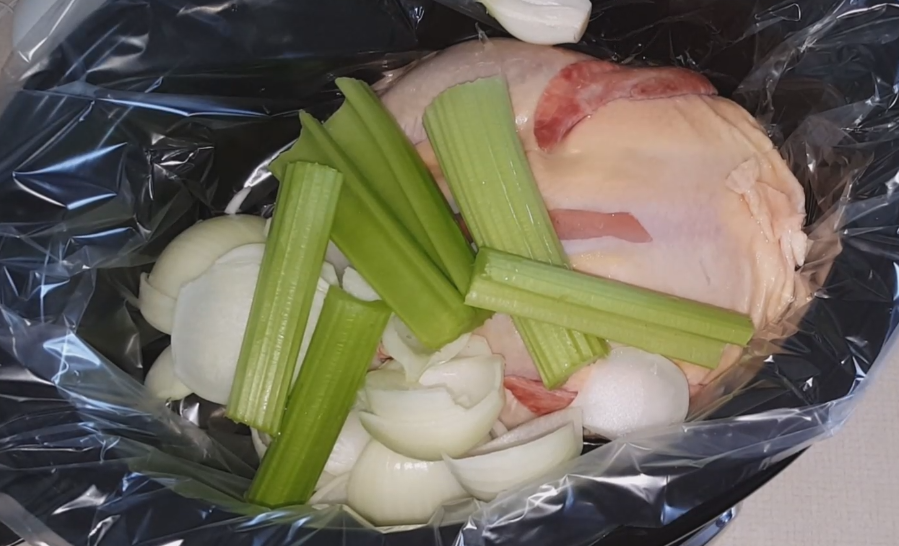
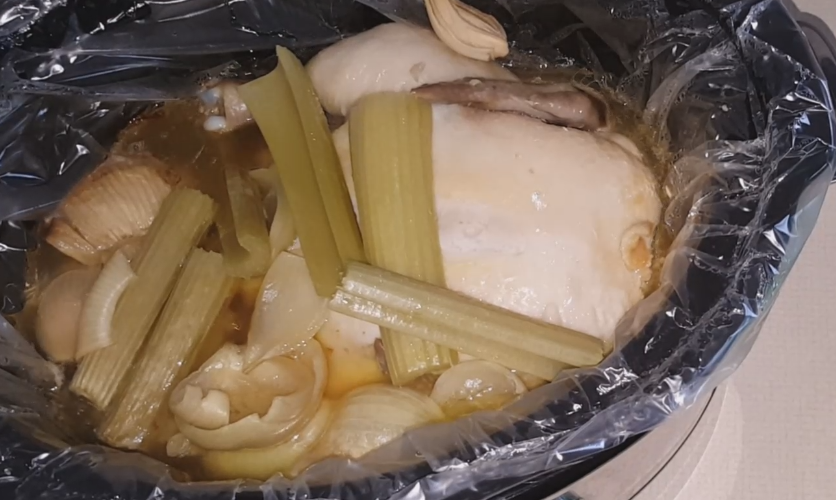
Basically just need a crock pot, crock pot liner, a whole chicken, onion if you want and maybe either celery or some other vegetable (such as carrots). 


All that you need to do is take the whole chicken and place it into the crock pot, add the amount of vegetables that you want to add to it (for flavoring), then cook it on low for 10 hours, then save the juices left over. Those can be bagged and sealed and placed in your freezer. 


Ingredients:

  • Whole Chicken
  • crock pot liner  (optional)
  • Vegetables (onions, carrots, celery, etc.. ) - optional

Directions: 

  1. Place a crock pot liner in your crock pot
  2. Place the Whole chicken inside of your crock pot
  3. add any vegetables that you want to
  4. add 3 cups of water
  5. cook the Whole chicken on low for 8 - 10 hours. 
  6. Once the chicken is done, grab a large bowl  add a colander into it. Remove the chicken and place into the colander (you may want some spatulas as it may fall apart)
  7. Once the juices have drained, move the chicken to a cutting board and do what you want with it (cut it up for dinner, use it in another recipes, etc.. )
  8. Remove the crock pot liner with the chicken stock / broth  inside of it. 
  9. Drain the chicken stock / broth  into the colander that is inside of the  bowl
  10. Place in your fridge overnight to allow the fat to solidify. 
  11. Remove the fat (if you want) and then place in bags to seal. 

See my video below on how this is done. 


Watch this video on Dailymotion - http://dai.ly/x6hz402

Watch this video on DTube - https://d.tube/v/jmrados/v0mvdsgk

Watch this video on YouTube -https://youtu.be/yAMX4_1JPfQ


Gluten Free, Keto Friendly, Low Carb, Beef Stock / Broth

I like to make my own broth / stock, mainly because I know what goes into it. It is even better when I can do it with farm fresh meats. I will usually make a bit of different kinds of broth / stock and store them into my freezer, sealed as that way I do not have to worry if it is gluten free or not (and not get myself and my daughter sick), nor do I have to worry about anything that may be in the stock.I know that I have at least 10 cups of each on hand in my freezer, and by cooking a roast you can easily save the juices and make your own stock. 

If you watch out what you put into the crockpot,you can easily use it. We used to use packets of french onion soup mix, but no longer do that. One of the main reasons we dont is that it is not gluten free, and the other is that it will give the beef broth a flavor of french onion soup, to which we do not want that in the stock. 

This only needs a few ingredients to make, and the nice thing is that you control what goes into it.
Basically just need a crock pot, crock pot liner, beef roast, onion if you want and maybe either celery or some other vegetable (such as carrots). 


All that you need to do is take the beef roast and place it into the crock pot, add the amount of vegetables that you want to add to it (for flavoring), then cook it on low for 10 hours, then save the juices left over. Those can be bagged and sealed and placed in your freezer. 


Ingredients:

  • Beef Roast
  • crock pot liner  (optional)
  • Vegetables (onions, carrots, celery, etc.. ) - optional

Directions: 

  1. Place a crock pot liner in your crock pot
  2. Place the beef roast inside of your crock pot
  3. add any vegetables that you want to
  4. add 3 cups of water
  5. cook the beef roast on low for 8 - 10 hours. 
  6. Once the beef roast is done, remove the roast. 
  7. In a large bowl  add a colander
  8. Remove the crock pot liner with the beef broth inside of it. 
  9. Drain the beef broth into the colander that is inside of the  bowl
  10. Place in your fridge overnight to allow the fat to solidify. 
  11. Remove the fat (if you want) and then place in bags to seal. 

See my video below on how this is done. 


 See this video on Dailymotion - http://dai.ly/x6hz2if

See this video on DTube - https://d.tube/v/jmrados/tz368luh

See this video on YouTube - https://youtu.be/4_vGP8c4k1I


DIY Liquid Laundry Detergent


Here is a simple recipe to make your own laundry detergent which can save you not only money, but can also help with scenting it the way that you want   (or scent free if you wish) and it may also help for those that have sensitivity issues to detergent (want to test it first to be sure)


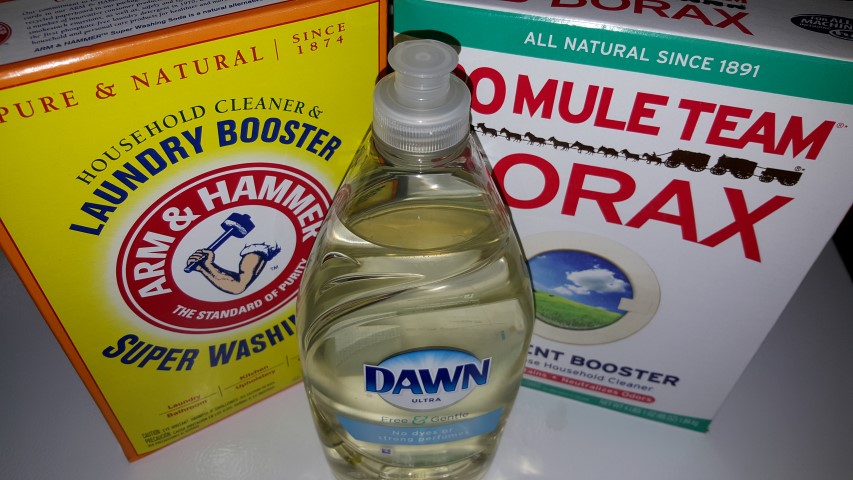
For this you need just 3 (4 technically) ingredients


  1. In a container, add the dry ingredients into a gallon container.
  2. Add 3-4 cups of hot water and mix until it is a milky color. 
  3. Fill the rest of the gallon container with cold water. 
  4. Add 3/4 cup of liquid dish soap  (you can use any dish soap. If you want a natural one such as Method or other brands)
  5. You can add a few drops of essential oils if you want to have it scented


See the video below on how easy this is to make. 


How to clean your fitbit


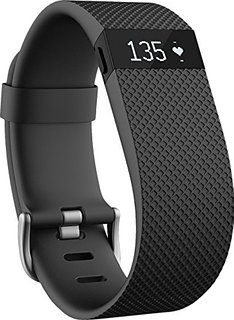
The fitbit, 

such a nice exercising tracking accessory to have, but since it is always on your wrist and you sweat, it collects the sweat and the dead sking and will start to stink eventually. The nice thing is that cleaning your fitbit is actually really easy and does not cost a lot of money to do. 

All you need are a few ingredients to do this simple task. 


Use the cotton rounds and add some alcohol to them and wipe down the fitbit down and try to get as much as possible to remove any dirt and grime from the fitbit. 

Use the Q-Tips dipped in alcohol to clean the small to reach areas including the charging ports. 

The tooth picks come in to play to remove the hard to reach areas to scrape out the dead skin. 


It should only take about 5 minutes to fully clean the fitbit. Let it fully dry before putting it back onto your wrist or before charging. Since you are using rubbing alcohol, it should only take a few minutes to dry off. I will also wipe down my wrist with the cotton rounds that have rubbing alcohol in them to remove any of the "stink"


See my video below on how to do this. 

Watch this video on Dailymotion -  http://dai.ly/x6ij6qu

Watch this video on DTube - https://d.tube/v/jmrados/gdhmnshm

Watch this video on YouTube - https://youtu.be/VzUkw6wxh0w


DIY Stain Remover

DIY Oil and Grease Stain Removing


Have you ever gotten a grease stain or a oil stain on your clothes that no matter how many times you wash them, they justnot come out? Every time I cook bacon, I seem to get some sort of oil or grease stain on my shirt or pants, or I will just get a stain from just about anything. 

If I am working on my car, I always seem to get stains when I am wearing clothes that I never inteded to get stained, but when I am wearing old clothes that I dont care about they always seem to be pristine. 

Grilling stuff or when I am making ranch dressing especially for pizza's, I seem to get stains from stuff dripping onto my shirts. 

Here is a extremely easy way to remove the stubborn stains without having to go out to the store and buy some sort of new stain stick that sometimes does not work, and you probably have everything that you need to remove the stain anyways. 


I use liquid dish soap and a old toothbrush

Simply put some liquid dish soap on the stain and use the toothbrush to work it in, then put the clothing aside for 5 or 6 days then wash it. If by some chance the stain does not come out, try it one more time by working in the dish soap then letting it sit for a week. If by the 2nd time it does not come out, then the chance of it coming out might be fairly slim. You can try it more times if you want, but so far I have not had the need to do this more than 2 or 3 times (for extremely stubborn stains)

Below is a video of what I do. 


Cordless, Mobile Dehumidifiers


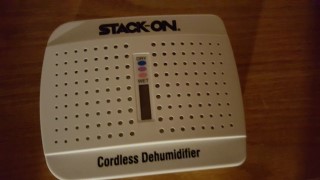
These cordless dehumidifiers are greatfor in gun safes, ammo containers, hunting supplies, keeping sealed containers dry, keeping moisture out of your important documents and many more. 


In the video below, I go over how these work and how to recharge them. They have so many different uses, to which I have 3 of them and 2 will usually travel with me in my air tight hunting containers to keep my hunting supplies dry. It is even better that I can easily recharge these.


How to recharge silica gel packets


Silica gel packets, they come in just about everything from medication containers to shoes (sometimes) and most people just throw them away not knowing their full potential. Most think that the silica gel packets are a one time use application and that they must be no good once they have been sitting in the open for a while, well I am here to tell you that the silica gel packets can be reused multiple times. 

What silica gel packets do, is they absorb moisture from their environment and then they hold it in the gel. After a while they do lose their ability to absorb more moisture and it is at that point that most people just throw them in the garbage, when they are essentially throwing away something that is useful, versatile, recyclable and money. 

[More]


Gluten Free, Keto Friendly, Buttermilk

Need buttermilk but do not want to run to the store?

Need buttermilk, but there is none where you are at?

Did you kno that you can make mock buttermilk?


Buttermilk is the liquid left over after making butter, so it is somewhat of a curdled high fat milk product. 

All you need to make it is just a few ingredients. 


Ingredients

  • 1 cup of heavy cream (if you want to use a lower fat milk you can, but then it will not be keto friendly)
  • 1 Tbsp of vinegar or 1 Tbsp of Lemon Juice. 

Directions:

  1. Mix the cream and the vinegar or the lemon juice together for a few seconds and then let it sit for about a minute or so. It should thicken up a bit and now you have buttermilk that you can use without having to run to the store


How to make your Thermacell cartridges refillable

Here is a quick and easy way to make your thermacell cartridges refillable. This will save a lot of money as you will not have to spend a bunch of money to get new cartrdiges, when with a little hack you can refill them youself. 

You only need a few things 


Take the lighter and remove the gas container. Using the dremel tool, carfully grind down some of the plastic but do not go too far. Try to remove the end that allows you to refill the lighter. 

Once you have the valve removed from the lighter, drill a small hole in the bottom of your thermacell cartrdige with a 7/32 drill bit. Once you have the hole in there, there will be a small metal bb that you want to remove. I am not sure why, not sure if this will prevent the gas from coming out the top valve or not?

Once you have a hole in the bottom of the cartdrige, mix up some of your epoxy and spread some on the sides of the valve that you remvoed and on the inside of the opening you drilled out. 

Place the valve inside and then add a good amount of epoxy around the valve on the bottom of the cartridge to ensure a good seal. Let this sit for 24 hours. 

After 24 hours you should be able to fill up the cartridge and now you can spend a LOT less money on butane that will fill 4 or 5 cartridges!


See the video below for full instructions. 

Watch this video on Dailymotion - http://dai.ly/x6ij3zw

Watch this video on DTube - https://d.tube/v/jmrados/lnqpaufc

Watch this video on YouTube - https://youtu.be/gy6HIRkaYoI


Previous Entries / More Entries